
Views: 0 Author: Site Editor Publish Time: 2026-08-31 Origin: Site


Designing a profitable souvenir thimble requires careful planning. You must balance historical authenticity, manufacturing constraints, and collector expectations. The market demands perfection in miniature forms. Selecting the wrong dimensions creates massive problems. It can result in motifs too distorted to read. Oversized products often fail to fit standard collector display cases. This friction directly impacts retail sell-through rates. Your brand reputation suffers when items look poorly planned. This guide breaks down how to specify exact measurements and material tolerances. You will learn strategies to ensure your custom run is cost-effective. We show you how to make products highly desirable to end consumers. By understanding standard display constraints, you can optimize your designs. We provide clear frameworks for packaging and material selection. Your next production run will align perfectly with buyer habits. You will confidently navigate vendor requirements and avoid costly molding errors.
Traditional tailor sizing differs vastly from display-first sizing. Functional sewing tools range from Size 6 to 12. Manufacturers base these sizes on human finger circumference. They prioritize ergonomic fit and needle-pushing utility. Collectible items serve an entirely different purpose. They prioritize visual storytelling over practical usability. You must abandon ergonomic guidelines when designing collectibles. A successful souvenir thimble size maximizes surface area. It provides a larger canvas for intricate artwork. At the same time, it must retain the traditional recognizable silhouette.
You must understand the collector’s ecosystem to succeed. Most buyers display their purchases in standard wooden cases. These cases feature strict physical constraints. Compartments typically measure 1.5 inches or roughly 38mm tall. A product exceeding 28mm in height creates friction. A width over 22mm also causes display issues. Buyers must seek out specialized shelving. This extra effort discourages repeat purchases. Collectors prefer items seamlessly fitting their existing setups.
Many creators design overly tall pieces. They want to fit more text onto the surface. This approach ruins the item's display viability. Another common error involves ignoring the center of gravity. Designs become top-heavy and constantly fall over. They fail the basic requirement of freestanding display. Always evaluate your sizing against real-world wooden shelf constraints.
Creating a reliable specification framework ensures production consistency. We recommend specific ranges for optimal results. Keep the height between 22mm and 28mm. This provides enough vertical space for layered artwork. Set the base diameter between 16mm and 20mm. A wider base ensures a stable center of gravity. The item must stand upright on any flat surface. Keep the top diameter between 12mm and 15mm. This maintains the essential recognizable taper.
Implementation realities dictate strict attention to wall thickness. Wall thickness directly impacts perceived value and weight. Extremely thin walls make the product feel cheap. Consumers associate heavy items with higher quality. However, making walls too thick causes issues. Shipping costs scale unnecessarily due to added weight. Internal casting flaws also increase during thick metal pours. You must find the perfect middle ground. Communicate clearly regarding your expected custom thimble dimensions.
Vendor shortlisting requires a logical approach. Do not commit to mold fees prematurely. Request pre-production dimensional drawings first. CAD files allow you to verify exact measurements. You can catch proportion errors before metal gets poured. Compare tolerances across different vendors.
| Dimension Parameter | Recommended Range (mm) | Primary Function |
|---|---|---|
| Overall Height | 22.0 - 28.0 | Provides vertical canvas; ensures shelf clearance. |
| Base Diameter | 16.0 - 20.0 | Creates stable center of gravity for freestanding display. |
| Top Diameter | 12.0 - 15.0 | Maintains traditional conical silhouette. |
| Wall Thickness | 1.2 - 2.5 | Balances premium weight against shipping constraints. |
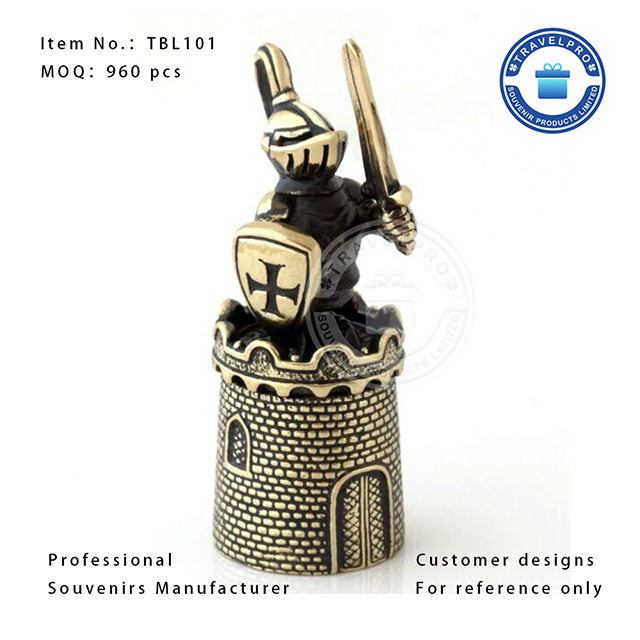
Material selection dictates your final dimensional tolerances. Three main solution categories dominate the market today. Die-cast zinc alloys provide excellent durability. Stamped brass offers distinct finishing options. Spun pewter delivers a traditional, premium feel. Each material requires a different engineering approach. You cannot use the same mold for different metals.
Features directly link to your desired outcomes. Different materials handle surface detailing in unique ways. We see distinct advantages across the categories.
Risk mitigation is crucial during the casting process. You must address metal shrinkage during cooling. Liquid metal expands when heated and contracts when cooled. A reputable collectible metal thimble manufacturer understands this physics principle. They will oversize the initial mold intentionally. Typically, they scale the CAD model up by 1-2%. This accounts for thermal contraction accurately. The final cooled product then perfectly matches your specified dimensions. Always ask your vendor about their shrinkage calculation methods.
Creators often approve exact-size molds without asking about shrinkage. The final pieces arrive 2% smaller than planned. They suddenly rattle loosely inside custom-fitted acrylic boxes. Always verify thermal contraction rates before signing off. Do not assume all metals shrink equally.
Translating highly detailed vertical artwork presents a unique business problem. Imagine adapting historical figures or monuments. A soldier souvenir design features tall, vertical proportions. You must wrap this onto a tapered, conical canvas. Doing this poorly results in severe visual distortion. The head might look stretched, while the feet look squashed. You must master surface area mapping to prevent this.
You need a reliable design framework. We recommend establishing a strict "Safe Zone". Confine the most critical details to the lower two-thirds. The circumference is widest at the base. This provides more horizontal real estate for complex features. Keep simple patterns near the narrow top.
Relief depth requires careful specification. Specify a maximum relief protrusion early in the process. Usually, 0.5mm to 1.5mm works best. This depth ensures the design remains tactile. It casts beautiful micro-shadows under retail lighting. However, it prevents the item from becoming too top-heavy. Excessive relief near the top ruins the center of gravity. The piece will refuse to stand upright.
This evidence-oriented approach saves thousands of dollars. It prevents ugly surprises during the sampling phase. You can confidently promise high-quality character reproductions.
Product dimensions deeply influence your packaging choices. Packaging dictates unit economics for heritage sites and museums. You cannot design the product in isolation. The item and its box must function together seamlessly. A slightly oversized piece might force a massive packaging upgrade. This instantly destroys your profit margins.
We see two primary packaging approaches dominating retail environments. Acrylic cubes offer a premium presentation. They protect the item from dust and theft. However, standard cheap acrylic cubes require strict adherence. Your item must stay under a 25mm maximum height. Exceeding this forces you into custom cube manufacturing. Blister cards provide a different solution. They are better suited for pegboard displays. Blister cards require a wider base diameter. A wider base prevents the item from rotating inside the plastic shell. You want the artwork always facing the consumer.
Take action by auditing your specific retail environment. Does your gift shop collectible rely on impulse-buy counter spinners? If so, footprint matters immensely. Factor the packaging footprint into your baseline dimensional requirements. Do this before ever requesting manufacturing quotes. Small footprint items allow more inventory on a single spinner. This directly increases potential revenue per square foot.
Successful souvenir programs never rely on guesswork. They reverse-engineer their dimensions meticulously. They base decisions on collector display standards and material tolerances. They adapt artwork complexity to fit the tapered canvas properly. You must treat sizing as a strategic business decision. It is not merely an aesthetic afterthought.
Start by documenting your exact requirements today. Create a formalized specification sheet. Include your required height, base diameter, and material preferences. Request minimum order quantities from specialized die-casting vendors. Ask for their specific mold fee structures. Compare their dimensional tolerances closely. This structured approach guarantees a highly profitable, desirable product.
A: Most fall between 22mm and 28mm (approx. 0.85 to 1.1 inches) to accommodate standard collector display cases.
A: Ceramics require thicker walls and have higher shrinkage rates during firing, whereas metal casting allows for thinner, more precise dimensions and sharper motif relief.
A: No. While they retain the traditional shape, souvenir variants prioritize surface area for artwork and stability for shelf display over ergonomic usability.
A: Costs vary based on 3D complexity and metal type, but custom molds generally require an upfront investment. Standardizing dimensions within a manufacturer's existing blank profiles can sometimes reduce this cost.

