
Views: 0 Author: Site Editor Publish Time: 2026-09-06 Origin: Site


Translating intricate branding or architectural designs into small metal canvases presents a massive challenge. Custom merchandise often looks muddy or illegible when reduced to pocket size. Detail fidelity in metal relies on much more than basic X and Y resolution. It heavily depends on the Z-axis. Buyers routinely over-specify or under-specify this vertical dimension. These common errors lead to blown budgets or subpar product quality. You need a better approach to dimensional scaling.
This article serves as a technical and commercial evaluation guide. It helps you dial in the exact specifications required for high-quality custom metal accessories. You will learn how to balance visual depth, physical durability, and specific manufacturing methods. We will explore how different metals react to varying depth profiles. Ultimately, you will gain the knowledge to communicate effectively with production partners and ensure flawless execution.
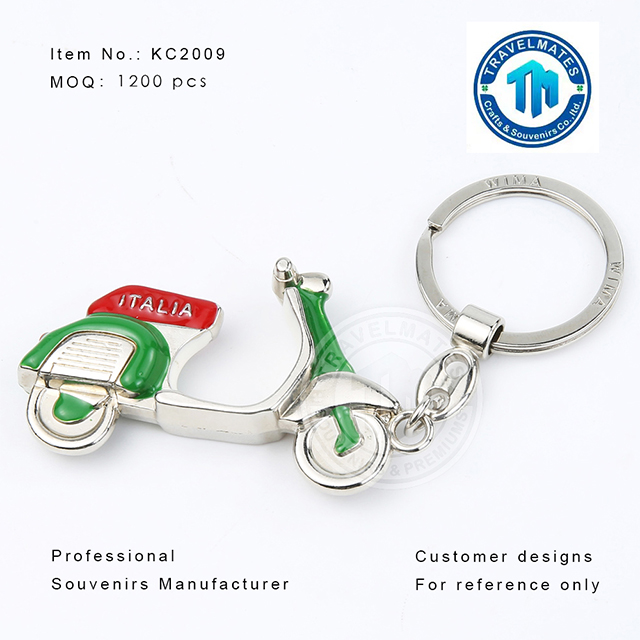
Understanding the Z-axis fundamentally changes how you approach metal design. Standard 2D stamping relies on flat raised and recessed levels. It creates a simple two-tier plateau. True multi-level 3D relief introduces sloped, contoured grading. It creates organic shapes and gradual elevation changes. When we discuss a 3D metal keychain relief, we refer to these fluid topographical shifts. The geometry maps digital gradients directly into a physical surface.
Draft angles play a critical role in this geometry. Deeper reliefs require specific draft angles. These slight slopes help the metal release cleanly from industrial molds. They also prevent laser-shadowing during modern engraving processes. These angles directly impact edge details. If you make a mold wall too steep, the metal snags during ejection. If you make it too shallow, you lose edge definition.
A successful 3D relief balances visual contrast with tactile smoothness. Users should feel distinct ridges and textures. They should never feel sharp, jagged edges. Getting this balance right guarantees a premium feel. We recommend running a tactile audit on physical samples. Run your thumb across the surface. It should glide without catching on steep metallic peaks.
Common mistakes often occur during the drafting phase. Designers frequently forget to account for the polishing process. Polishing removes a microscopic layer of metal. If your geometric slopes lack sufficient depth, polishing will erase your fine details completely. Always build a slight depth buffer into your initial 3D files.
Varying depths capture entirely different design elements. Micro-details require distinct settings compared to macro-shapes. Shallow relief usually measures under 0.5mm. It works perfectly for clean text and simple logos. It handles flat background textures beautifully. However, it fails when you introduce organic complexity.
Moderate to deep relief typically spans from 0.5mm to 2.0mm or more. You absolutely need this depth for complex topography. It accurately renders overlapping building facades, cobblestone streets, fur, or foliage. This deeper range is where intricate landmark detail thrives. Without sufficient Z-axis space, overlapping elements blend together. They become an unrecognizable metallic lump.
Table 1: Depth Category Optimization
| Depth Category | Z-Axis Range | Best Application Elements | Visual Effect |
|---|---|---|---|
| Ultra-Shallow | 0.1mm - 0.3mm | Fine fonts, micro-textures | Subtle contrast, flat tactile feel |
| Standard Shallow | 0.3mm - 0.5mm | Corporate logos, vector art | Clear boundaries, crisp edges |
| Moderate 3D | 0.5mm - 1.2mm | Animal fur, basic architecture | Noticeable slope, rich shadows |
| Deep 3D | 1.2mm - 2.5mm+ | Human faces, complex overlapping | High realism, dramatic lighting |
Consider the mechanics of light and shadow. Natural depth captures ambient light efficiently. It creates high-contrast shadows naturally across the metal surface. You reduce the need for secondary processes. You can often skip antiquing liquids or enamel fills entirely. The metal relies on its own topography to define the artwork.
You must also respect the legibility threshold. Small text struggles immensely in deep reliefs. High surrounding metal walls cast shadows over tiny letters. Keep typography above a specific minimum size. Often, letters must exceed 1.5mm in height. Otherwise, they become obscured by the surrounding macro-shapes. If you need tiny text, place it on the highest plateau of your design.
Selecting the right production method determines your project's success. Die cast production suits high-volume, traditional manufacturing runs. Manufacturers inject molten zinc alloy into CNC-machined steel molds. This process uses immense pressure to force liquid metal into every crevice.
The depth capabilities here are outstanding. This method excels at creating deep, sweeping curves. A standard die cast keychain easily achieves substantial topographical variations. The commercial reality involves high initial mold fees. However, you get an incredibly low unit cost at scale. It fits enterprise merchandise and massive promotional campaigns perfectly.
Conversely, 3D laser engraving suits low-volume or highly customized batches. Fiber or MOPA lasers use grayscale mapping software. They literally burn away material layer-by-layer. Darker pixels in the file tell the laser to dig deeper.
The depth capabilities shift toward micro-precision. You get unmatched accuracy for microscopic textures. However, pushing deep reliefs requires significantly longer cycle times. The commercial reality is appealing for startups. You pay zero tooling costs. The trade-off is a high time-per-unit metric. It works best for premium, serialized, or ultra-custom limited batches.
Manufacturing Method Comparison Chart
| Feature | Die Cast Molding | 3D Laser Engraving |
|---|---|---|
| Initial Tooling Cost | High (CNC steel mold) | Zero (Software file only) |
| Unit Cost at Scale | Extremely Low | Remains High |
| Best Detail Type | Sweeping macro-slopes | Razor-sharp micro-textures |
| Volume Sweet Spot | 500+ units | 1 - 100 units |
| Depth Speed | Instant per unit | Slow (Layer by layer) |
Designing custom accessories introduces physical risks. We must discuss the common "pocket wear" problem. A deeply raised metal keychain creates aggressive friction points. High-protrusion details are highly prone to scratching. They dent easily when dropped on concrete. They can even wear through pocket fabric over time. You must round off sharp peaks during the design phase.
Material constraints matter immensely in this context. Softer metals allow for deeper, easier molds. Pewter accepts intricate, deep shapes beautifully. However, it wears out much faster in daily use. Harder metals limit your maximum viable depth. Brass and stainless steel resist wear brilliantly. But they restrict how deep the industrial press can push.
Cost scaling relies heavily on your requested Z-axis. Deep molds take significantly longer to CNC machine. Deep laser engraving burns many more machine hours. The relationship between relief depth and production cost is mostly linear. Every extra millimeter adds production time. You pay directly for that time. Evaluate if that extra millimeter truly enhances the user's perception of the product.
Weight also becomes a critical factor. Deeper reliefs demand thicker base metals. A standard piece might weigh 15 grams. A deeply sloped piece might weigh 35 grams. This extra weight increases shipping costs. It also feels heavier in the pocket, which some users dislike. Always balance perceived premium weight against practical daily carry convenience.
You must approach your manufacturer with precise data. How do you audit your art file properly? Assess the core design carefully. Does it actually require continuous 3D slopes? A cheaper 2D/3D hybrid approach might suffice. You can mix flat raised areas with selective sloped regions. This saves machining time and reduces costs.
Consider grayscale optimization for laser projects. Software preparation is crucial here. Ensure your depth map properly correlates black-to-white gradients. White usually signals zero engraving depth. Solid black commands maximum laser power. Smooth gray transitions create your slopes. Bad gradients result in stepped, ugly physical layers.
Use this specific Vendor RFQ Checklist when communicating with partners:
Following this checklist prevents expensive miscommunications. It sets clear boundaries for both you and the production facility. It guarantees that the final physical product matches your original vision.
The right depth specification isn't simply "as deep as possible." It is the exact measurement required to make critical details recognizable. You must achieve this without compromising the item's daily utility. Pushing limits creates beautiful art, but it often creates terrible pocket accessories.
Audit your current vector or 3D art files today. Consult with your production partner early in the design process. Find the specific threshold required for your design's complexity. Test different metal hardness levels. Balance your production budget against the perceived premium value. Execute your next custom merchandise run with complete confidence.
A: Typically 3mm to 4mm, allowing enough material thickness to accommodate 1mm-1.5mm of relief without compromising structural integrity.
A: Yes, but traditional hard enamel requires flat planes. 3D reliefs are typically paired with recessed antiquing or selective soft enamel to avoid burying the depth.
A: This is usually due to inadequate mold depth relative to the detail size, poor draft angles, or over-polishing during the finishing stage, which smooths out sharp edges.
A: Not necessarily deeper, but far sharper. Lasers excel at high-fidelity micro-depths, whereas molding is more efficient for high-volume, deep-sloping topography.

